About Plugins
Plugins are a great way to customize your site on Organic CMS. They can be installed to introduce new functionality or extend existing capabilities. Here, we'll explore how best to work with them as an Organic CMS developer.
Because adding and removing plugins requires code changes, plugins cannot be installed directly from the Organic CMS dashboard. Instead, they must be managed through your site's GitHub repository.
Option 1: Manage Plugins via Code
Adding Plugins to Staging
Plugin code will need to be added to the plugins folder in your site's GitHub repository and committed in order to make the plugin available on staging and/or production environments.
- Download the plugin from the WordPress Plugins Directory.
- Unzip the plugin and add the unzipped plugin's folder to
backend/src/web/app/pluginsin your local environment. - Test changes in your local environment.
- Create a pull request with the new code.
- Merge the pull request into the master branch to push the plugin to the staging environment.
While the WordPress Plugins Directory is the recommended source for plugins, Organic CMS can support other third-party and publisher-developed plugins as well. Please contact us with any questions about plugin compatibility.
Releasing Plugins to Production
Production deployments are simply a matter of creating and publishing a Release from your site's GitHub repository.
From the GitHub repository page, navigate to the Releases section from the right menu:
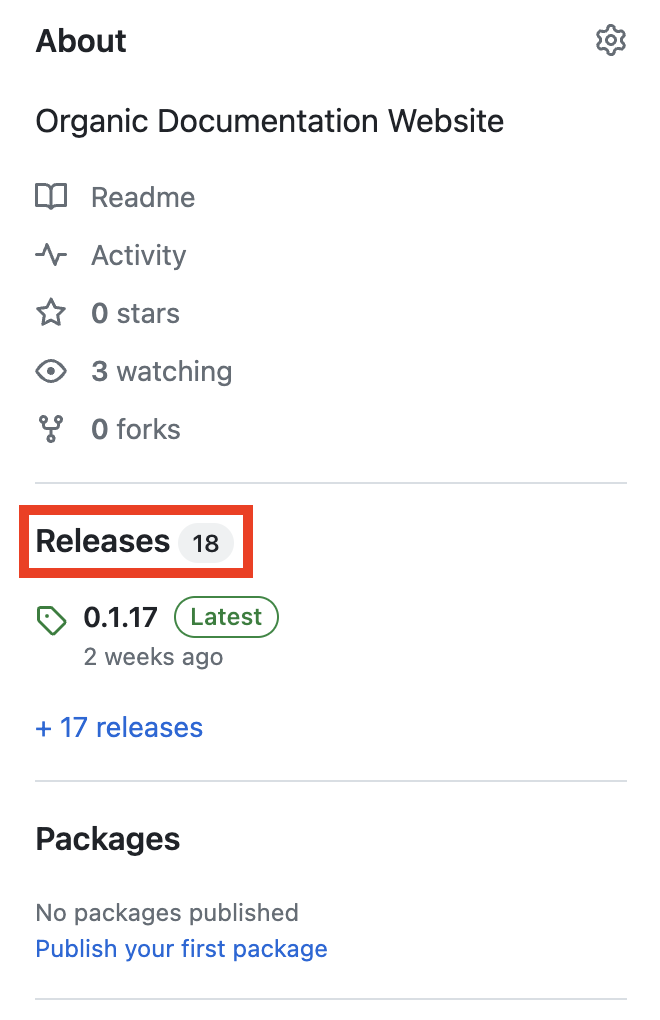
Clicking on the Releases title will open the Releases page. Here, you'll find all releases — including the latest published release and a draft release that includes all pending changes that have been merged into the master branch, are live in the staging environment, but have not yet been released to the production environment.
The draft release will look something like this:
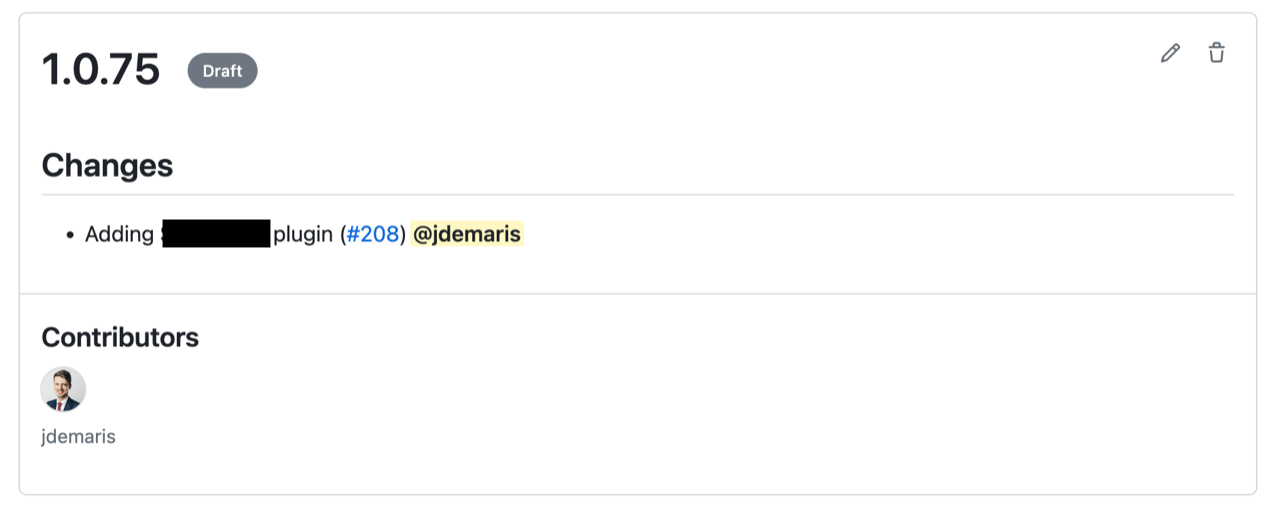
You may see additional changes and contributors listed in the draft release. If this is the case, it's worth confirming with those contributors that their changes are ready for release. In some cases, they may still be actively working on testing their changes on the staging environment.
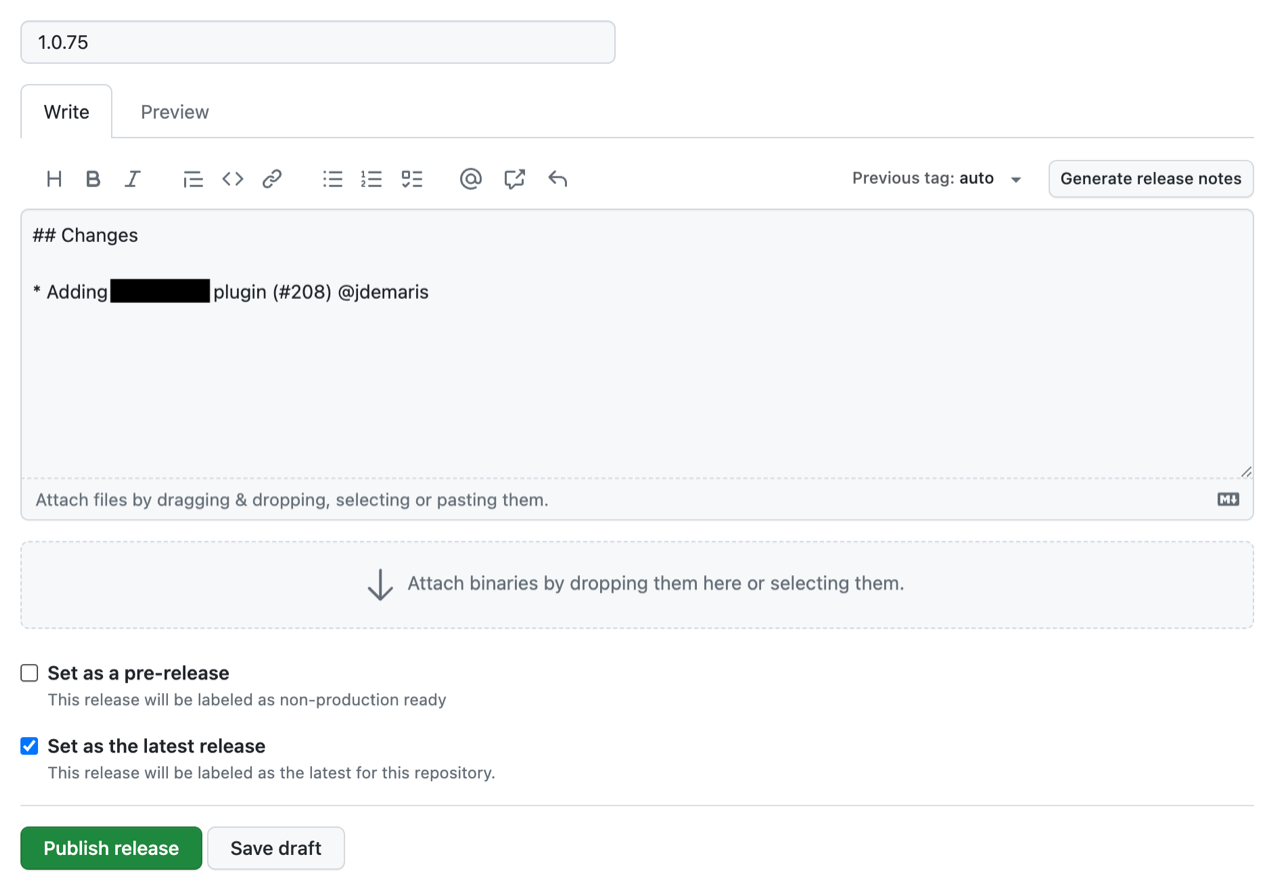
Publishing Releases
To publish your changes, click the pencil icon on the draft release to open the Release Editor. All values are automatically populated, so all that's needed is to click the "Publish release" button at the bottom of the editor:
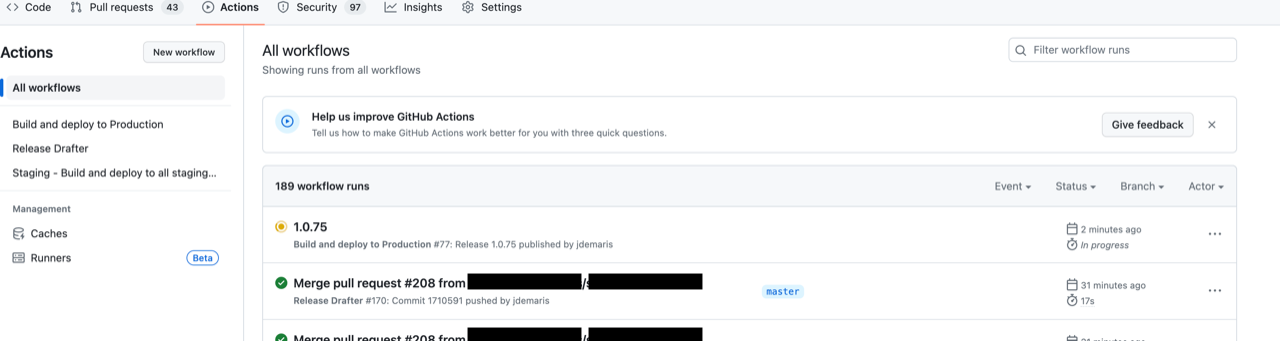
The rest of the process is handled automatically by GitHub Actions. If you would like to follow along with the deployment, navigate to the Actions page from the top menu in your GitHub repository. Here, you'll be able to monitor the release's progress, debug any issues, or see if the process has completed successfully:
Activating Plugins
Plugin activation can be managed from the Organic CMS dashboard.
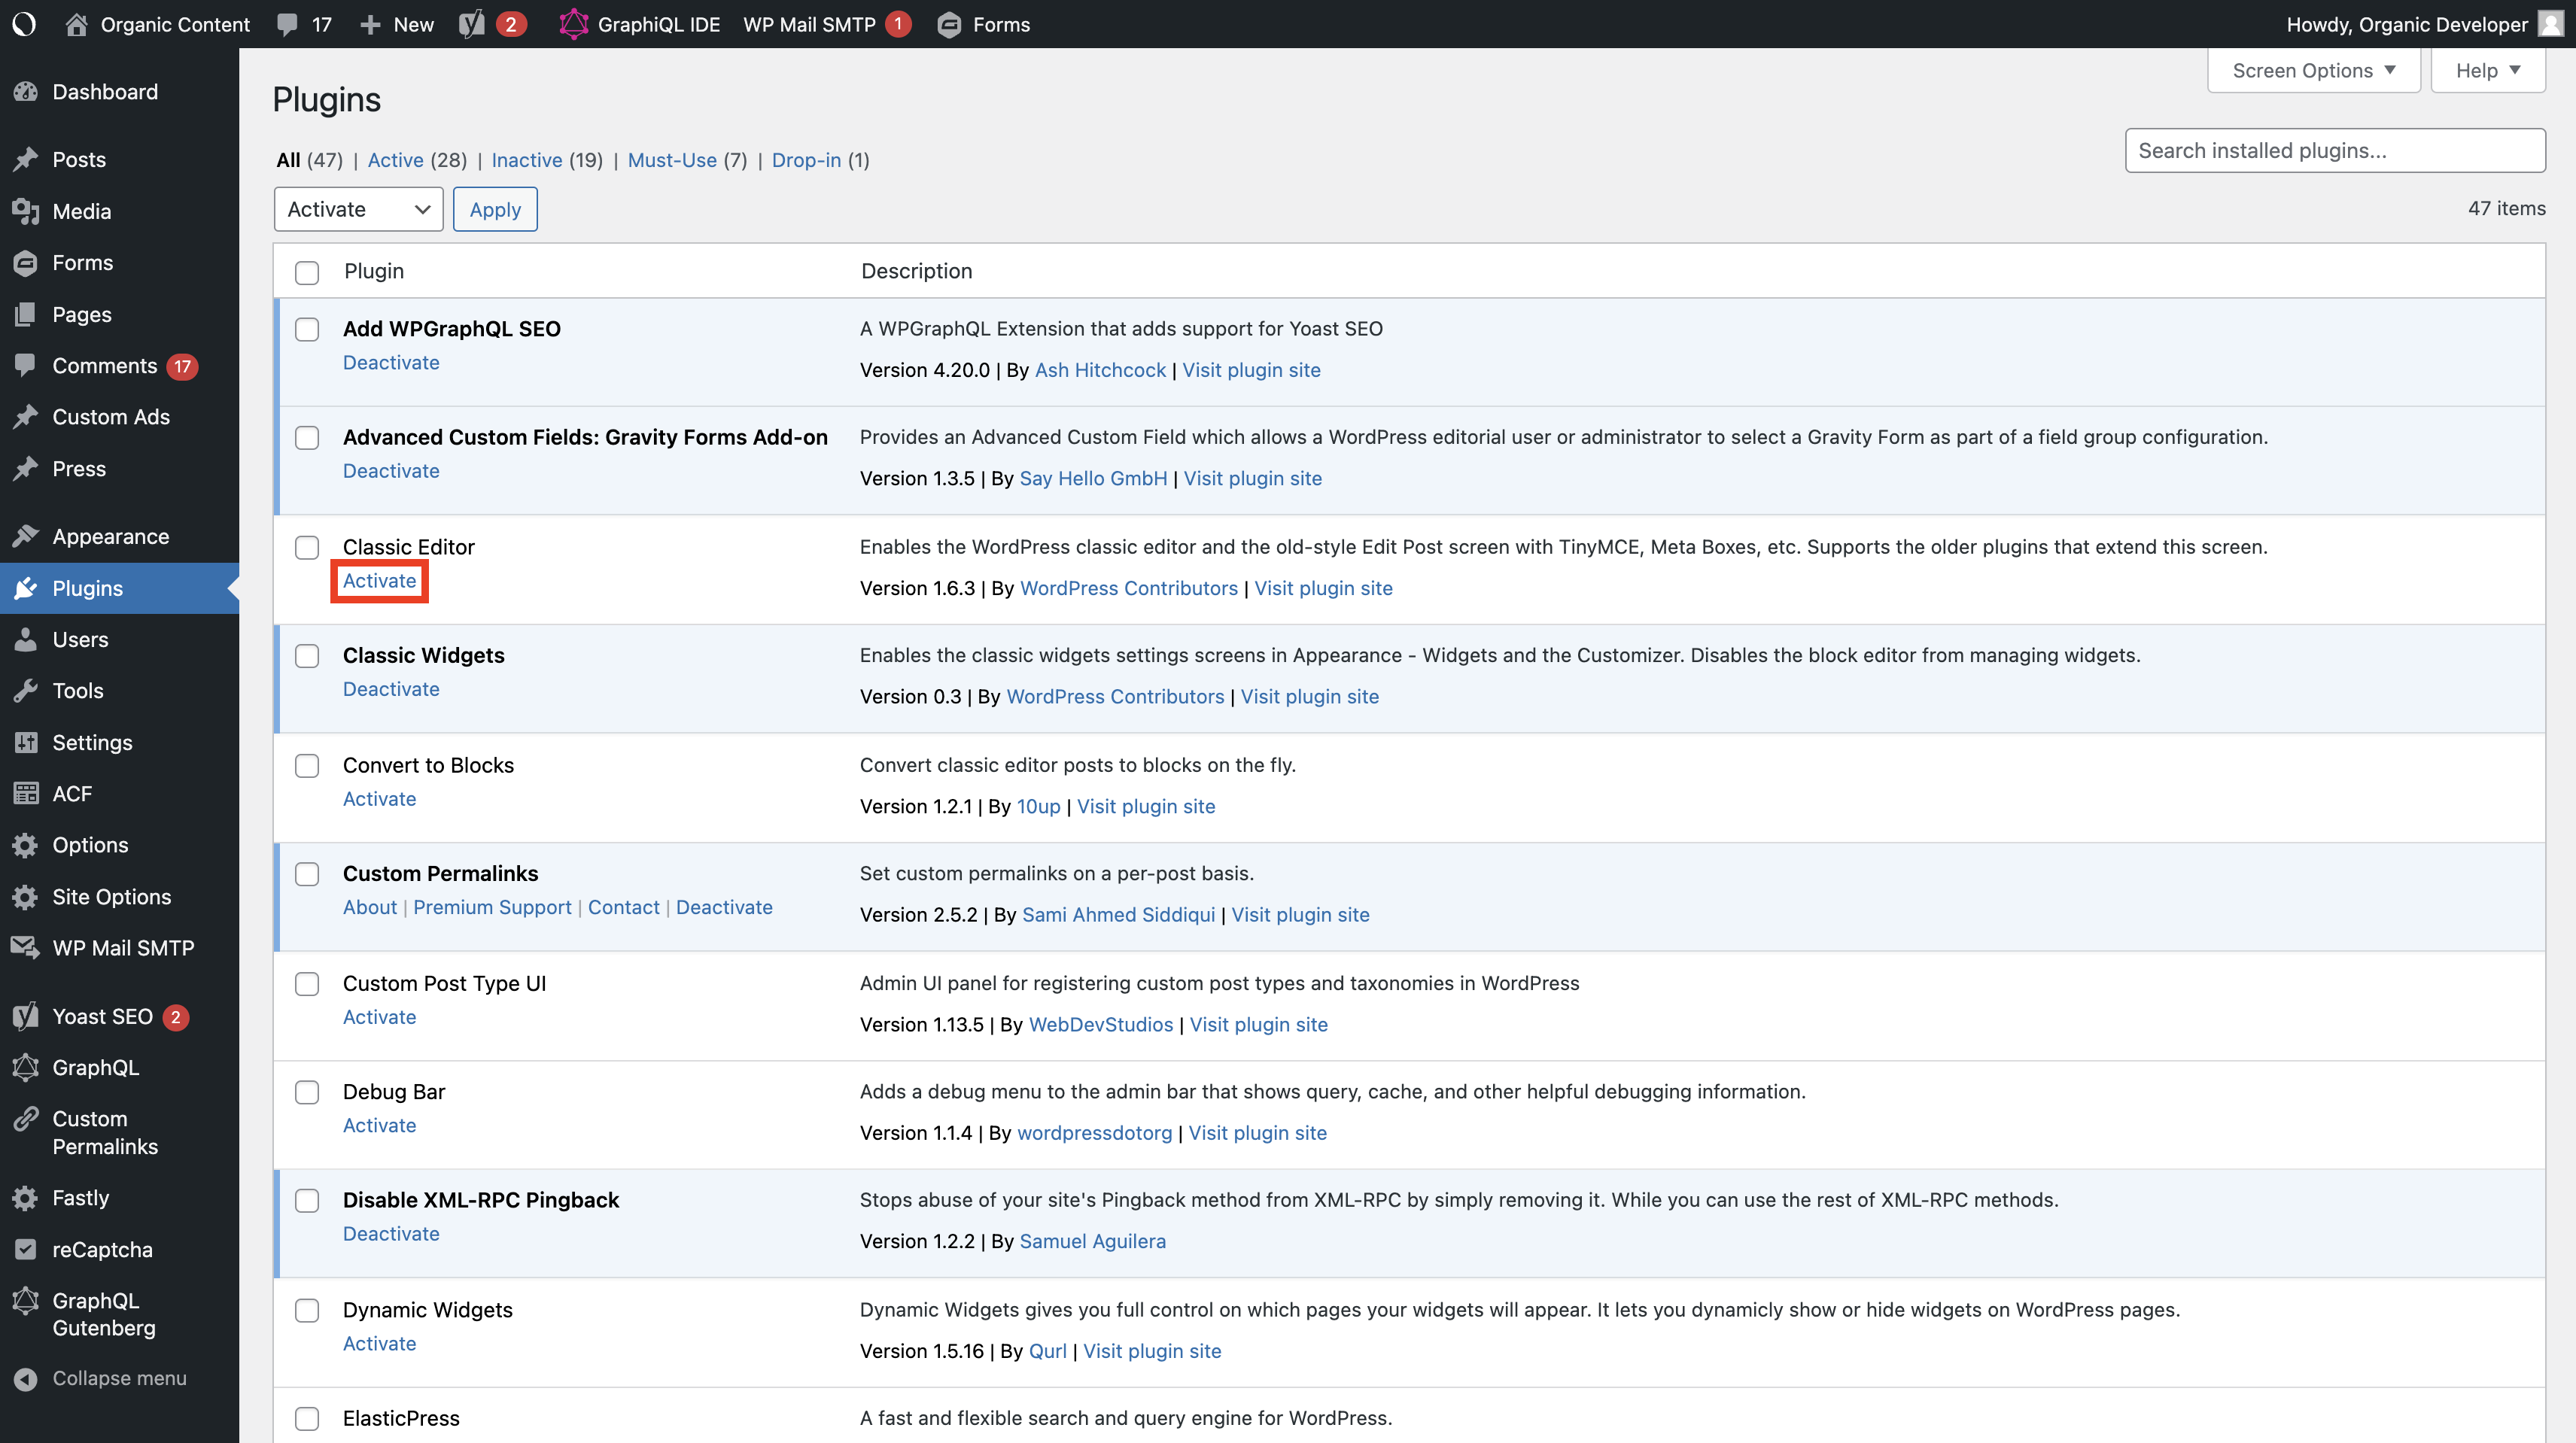
- Navigate to Plugins from the left menu for a list of installed plugins.
- Locate the plugin(s) you've recently added and click "Activate".
- Make any additional changes required such as plugin configuration or entering license information on the plugin's settings page.
Plugin activation and configuration are specific to each environment (local, staging, and production) and managed independently.
If activating more than one plugin at a time, you can check the box next to each plugin and apply "Activate" as a bulk action.
Updating Plugins
Plugin updates can be handled using the same steps as installing a plugin. Download the latest version of your plugin and replace the existing version in backend/src/web/app/plugins.
Deactivating Plugins
Plugin deactivation can be managed from the Organic CMS dashboard.
- Navigate to Plugins from the left menu for a list of installed plugins.
- Locate the plugin(s) you want to disable and click "Deactivate".
Deactivating a plugin can have unexpected consequences for a site. Organic recommends deactivating any unnecessary plugins in the staging environment first, then in production once it has been confirmed that the change will not break essential functionality or significantly degrade performance.
Removing Plugins
Removing a plugin will require very similar steps to installing a plugin.
- Remove the plugin's code from the plugin folder in your local environment.
- Test changes in your local environment.
- Create a pull request with the code removed.
- Merge the pull request into the master branch to remove the plugin from the staging environment.
- Publish a release to remove the plugin from the production environment.
Removing a plugin can have unexpected consequences for a site. Organic recommends deactivating any unnecessary plugins from the Organic CMS Dashboard first, then removing them some time later if site performance is not negatively impacted by deactivation. Activating/deactivating plugins is much quicker than adding/removing them through code changes.
Managing Plugins with Composer
Some developers may elect to manage plugins and other dependencies though third-party solutions such as Composer. This approach still requires code changes to add/update/remove plugins, but without the need for downloading plugins locally and uploading them to the site's repository. Instead, plugin versions are managed using a composer.json file.
Plugins which supports installation via Composer can be managed via Organic Github Action WordPress Plugins workflow.
You need to have write access to the corresponding site's repository in GitHub to use it.
-
Open the site's repository in GitHub and navigate to
Actions -> WordPress Pluginsand click theRun Workflowbutton. -
Choose the desired action, enter the WordPress plugin name, and specify the version you'd like to install. If you're updating an existing plugin that's already installed on your site, you can find the name in the
src/composer.jsonfile in your repository. If you're installing a new plugin, first search for it on Packagist and then prependwpackagist-plugin/to the name. For example, theFastlyplugin would bewpackagist-plugin/fastly, like in the following screenshot: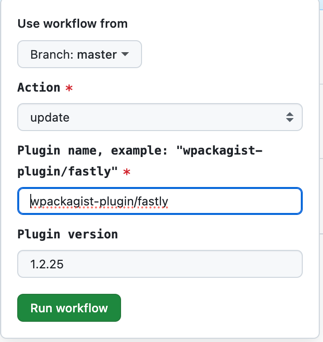
If the plugin is not listed on Packagist, you'll need to find the name in the Composer repository where it's published.
-
Click the
Run Workflow Buttonand wait until workflow is finished. Once it's done, it will create a pull request containing the necessary code changes. Visit thePull requeststab in your repository, find the pull request, and merge it. Once you do this, it will deploy the plugin changes to your staging site so you can test them out. -
To push the changes to production please follow the Releasing Plugins to Production step.
This method is approved for use with Organic CMS. Please contact us with any questions about compatibility.
Option 2: Request Plugin Updates via Flexpress
Flexpress can handle plugin updates on your behalf. To do so:
-
Submit a support request to support@flexpressai.com including:
- The plugin name
- The desired version (if applicable)
- Your target deadline for the update
-
Allow 2–3 weeks for the update to be completed